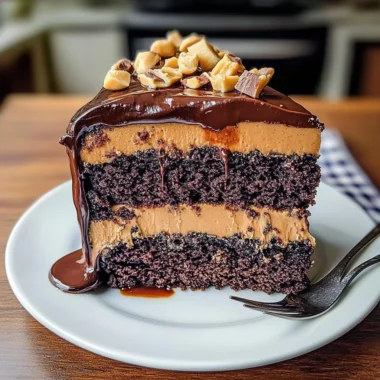
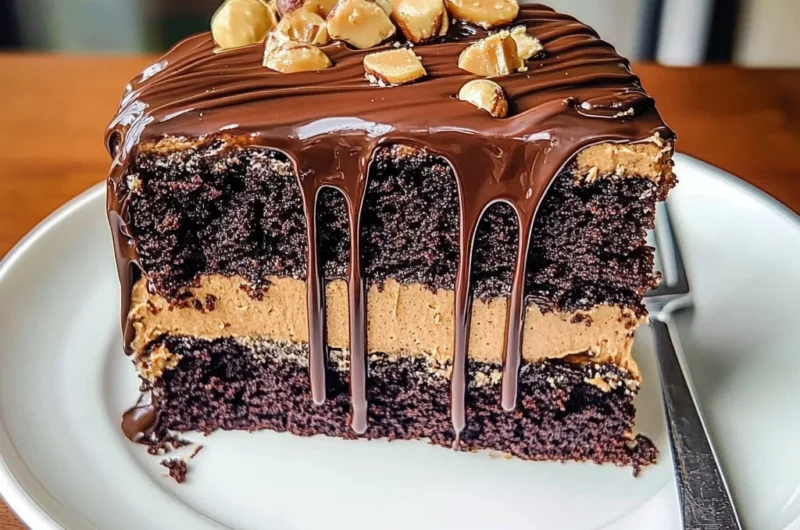
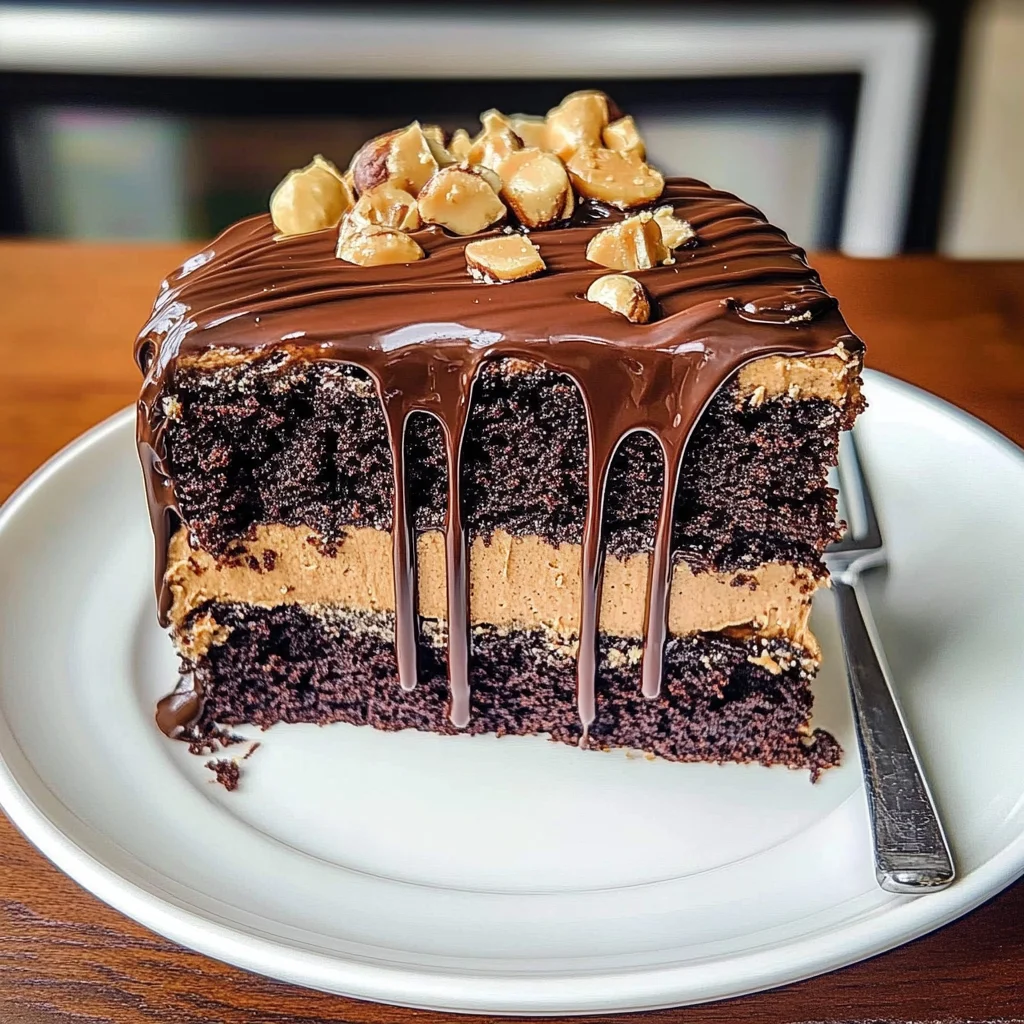
Imagine sinking your fork into a slice of chocolate peanut butter cake, where the rich, velvety chocolate meets the creamy, nutty embrace of peanut butter, creating a symphony of flavors that dances on your palate. The aroma wafts through the air like a warm hug on a chilly day, instantly transporting you back to carefree childhood moments spent in the kitchen, sneaking spoonfuls of batter and dreaming of sweet indulgence.
This delightful dessert isn’t just for special occasions; it’s perfect for any gathering where laughter and joy are on the menu. Picture friends gathered around the table, eyes wide with anticipation as they savor each bite, relishing that perfect balance of sweetness and richness. Trust me when I say this chocolate peanut butter cake will become your go-to recipe for making memories that last a lifetime!
Why is chocolate peanut butter cake irresistible?
Decadent flavors collide in this rich dessert that will have you swooning.
Quick to make, this recipe simplifies baking without sacrificing taste.
Versatile options allow you to customize toppings or fillings for every occasion.
Crowd-pleaser status means it’s perfect for parties, potlucks, or family gatherings.
Indulgent yet easy, you’ll impress your guests while saving time in the kitchen!
Chocolate Peanut Butter Cake Ingredients
For the Cake
- All-purpose flour – provides structure; be sure to sift for a lighter texture.
- Granulated sugar – adds sweetness and helps create that tender crumb.
- Cocoa powder – gives that rich chocolate flavor; opt for unsweetened for the best results.
- Baking powder – ensures your cake rises beautifully and has a soft texture.
- Baking soda – paired with the cocoa, it balances acidity for a perfect taste.
- Salt – enhances all flavors, making the chocolate peanut butter cake even more delicious!
- Eggs – bind everything together and add moisture; you can substitute with flax eggs for a vegan option.
- Buttermilk – adds tanginess and keeps the cake super moist; you can use milk with a splash of vinegar as a substitute.
- Vegetable oil – helps create a moist crumb; melted butter can also work here if you prefer.
For the Peanut Butter Frosting
- Creamy peanut butter – gives that luscious nutty flavor; choose natural for healthier options!
- Unsalted butter – adds richness; make sure it’s softened to room temperature for easy mixing.
- Powdered sugar – sweetens and thickens the frosting; sift it to avoid lumps in your frosting.
- Vanilla extract – enhances all flavors; opt for pure vanilla for the best outcome!
- Heavy cream or milk – adjust consistency to your liking, making it spreadable yet luxurious.
This delicious chocolate peanut butter cake is sure to become a family favorite!
How to Make chocolate peanut butter cake

1. Preheat your oven to 350°F (175°C). This step ensures your cake bakes evenly, resulting in a perfect rise and delightful texture.
2. Prepare your baking pan by greasing it with butter or lining it with parchment paper. This helps prevent sticking, ensuring every crumb of your chocolate peanut butter cake comes out easily.
3. Mix the dry ingredients together in a large bowl: flour, cocoa powder, baking powder, and salt. Whisk until combined, which will create a rich foundation for your cake’s flavor.
4. Cream the butter and sugar in another bowl until light and fluffy—about 3-5 minutes. This adds air into the batter, leading to a wonderfully soft texture.
5. Add the eggs one at a time, beating well after each addition. This step helps incorporate them fully, ensuring your cake is moist and has an even crumb.
6. Combine the wet and dry ingredients gradually, alternating with the buttermilk. Mix until just combined; overmixing can make your cake dense instead of fluffy.
7. Spoon the batter into the prepared pan and smooth the top with a spatula. Bake for 25-30 minutes or until a toothpick inserted in the center comes out clean.
8. Cool the cake in the pan for about 10 minutes before transferring it to a wire rack to cool completely. This prevents sogginess as it finishes cooling.
9. For the Frosting: In a medium bowl, beat together peanut butter, powdered sugar, and cream until creamy and smooth—about 2-3 minutes.
10. Spread the frosting generously over the cooled chocolate cake using an offset spatula for an even layer that looks as good as it tastes!
Optional: Top with crushed peanuts for added crunch and visual appeal.
Exact quantities are listed in the recipe card below.
Tips for the Best chocolate peanut butter cake
- Room Temperature Ingredients: Ensure all ingredients are at room temperature for a smoother batter and better rise in your chocolate peanut butter cake.
- Quality Chocolate: Use high-quality cocoa powder or dark chocolate to enhance the richness of your cake, avoiding overly sweet options that can dilute flavor.
- Don’t Overmix: Mix just until combined. Overmixing can lead to a dense texture instead of the light, fluffy cake you desire.
- Proper Cooling: Allow your cake layers to cool completely before frosting. This prevents melting and ensures your chocolate peanut butter cake has a perfect finish.
- Frosting Consistency: Aim for a spreadable yet thick frosting. If it’s too runny, refrigerate briefly to achieve that luscious consistency without compromising taste.
How to Store and Freeze chocolate peanut butter cake
- Room Temperature: Enjoy your chocolate peanut butter cake fresh for up to 3 days when stored in an airtight container, away from direct sunlight.
- Fridge: For extended freshness, keep your cake in the fridge for up to a week. Make sure it’s tightly wrapped to maintain moisture.
- Freezer: Freeze slices of chocolate peanut butter cake for up to 3 months. Wrap each slice in plastic wrap, then place them in a freezer-safe bag for best results.
- Reheating: When ready to enjoy, simply thaw your frozen cake overnight in the fridge and bring it to room temperature before serving for the best flavor.
Chocolate Peanut Butter Cake Variations
Customize this delightful treat to suit your taste buds and dietary needs; let your creativity shine through each delicious bite!
- Dairy-Free: Swap regular milk for almond or oat milk, and use dairy-free chocolate chips. You’ll still achieve that rich, creamy texture without the dairy.
- Gluten-Free: Substitute all-purpose flour with a 1:1 gluten-free blend. This allows everyone to enjoy the cake while keeping it fluffy and moist.
- Nut-Free: Replace peanut butter with sunbutter or a seed butter of your choice. It’s a fantastic way to maintain creaminess without nuts!
- Extra Chocolatey: Add chocolate chips into the batter or top with chocolate ganache. This variation amplifies the chocolate flavor for true chocoholics.
- Spicy Twist: Mix in a pinch of cayenne pepper or cinnamon for a warm kick. The subtle heat pairs beautifully with the sweet flavors, creating a unique experience.
- Fruit-Filled: Incorporate mashed bananas or applesauce into the batter for added moisture and natural sweetness. This twist adds an extra layer of flavor and nutrients.
- Vegan: Use flax eggs instead of regular eggs and coconut oil in place of butter. Your vegan friends will appreciate this indulgent yet plant-based option!
- Coffee Infusion: Add brewed espresso or instant coffee granules to enhance the chocolate flavor. The coffee adds depth, making each forkful even more irresistible!
Make Ahead Options

If you’re looking to save time while still serving up a delicious chocolate peanut butter cake, you’re in the right place! This recipe is perfect for meal prep, allowing you to enjoy its rich flavors without the last-minute rush. You can prepare the cake layers up to 3 days in advance; just wrap them tightly in plastic wrap and store them at room temperature. For the frosting, it can be made a day ahead—simply refrigerate it in an airtight container. When you’re ready to serve, just bring the frosting back to room temperature and re-whip it for that perfect spreadability. Remember to assemble your cake just before serving to maintain its moist texture and delicious flavor—your family will thank you for this time-saving strategy!
chocolate peanut butter cake Recipe FAQs
What type of peanut butter should I use for the chocolate peanut butter cake?
For the best flavor and texture, use creamy, natural peanut butter. Look for options with minimal ingredients—just peanuts and salt is ideal. Avoid crunchy varieties unless you’re aiming for added texture in your cake.
How should I store my chocolate peanut butter cake?
To keep your cake fresh, store it in an airtight container at room temperature for up to 3 days. If you need it to last longer, refrigerate it for up to a week. Just remember that refrigeration might slightly alter its texture, making it a bit denser.
Can I freeze the chocolate peanut butter cake?
Absolutely! Wrap individual slices or the whole cake tightly in plastic wrap and then aluminum foil to prevent freezer burn. It can be frozen for up to 3 months. When you’re ready to enjoy, simply thaw it overnight in the refrigerator before serving.
What should I do if my cake is dry?
If your chocolate peanut butter cake turns out dry, it might have been overbaked or not enough moisture was added. Next time, check for doneness a few minutes early by inserting a toothpick; it should come out with a few moist crumbs but not wet batter. You can also try adding an extra egg or a splash of milk for added moisture!
Are there any dietary alternatives for this recipe?
Certainly! For gluten-free options, substitute regular flour with a 1: 1 gluten-free flour blend. If you’re looking for a lower sugar option, consider using coconut sugar or a sugar substitute like stevia, just be mindful of how these may affect the texture and flavor.
Can I add other flavors or mix-ins to the chocolate peanut butter cake?
Definitely! This cake is quite versatile. You can fold in mini chocolate chips for extra sweetness or even swap half of the cocoa powder with espresso powder to enhance the chocolate flavor. Just remember that adding significant mix-ins may require slight adjustments in baking time!
Chocolate Peanut Butter Cake
Ingredients
Method
- Preheat your oven to 350°F (175°C).
- Prepare your baking pan by greasing it with butter or lining it with parchment paper.
- Mix the dry ingredients together in a large bowl: flour, cocoa powder, baking powder, and salt. Whisk until combined.
- Cream the butter and sugar in another bowl until light and fluffy—about 3-5 minutes.
- Add the eggs one at a time, beating well after each addition.
- Combine the wet and dry ingredients gradually, alternating with the buttermilk. Mix until just combined.
- Spoon the batter into the prepared pan and smooth the top with a spatula. Bake for 25-30 minutes or until a toothpick inserted in the center comes out clean.
- Cool the cake before frosting.